
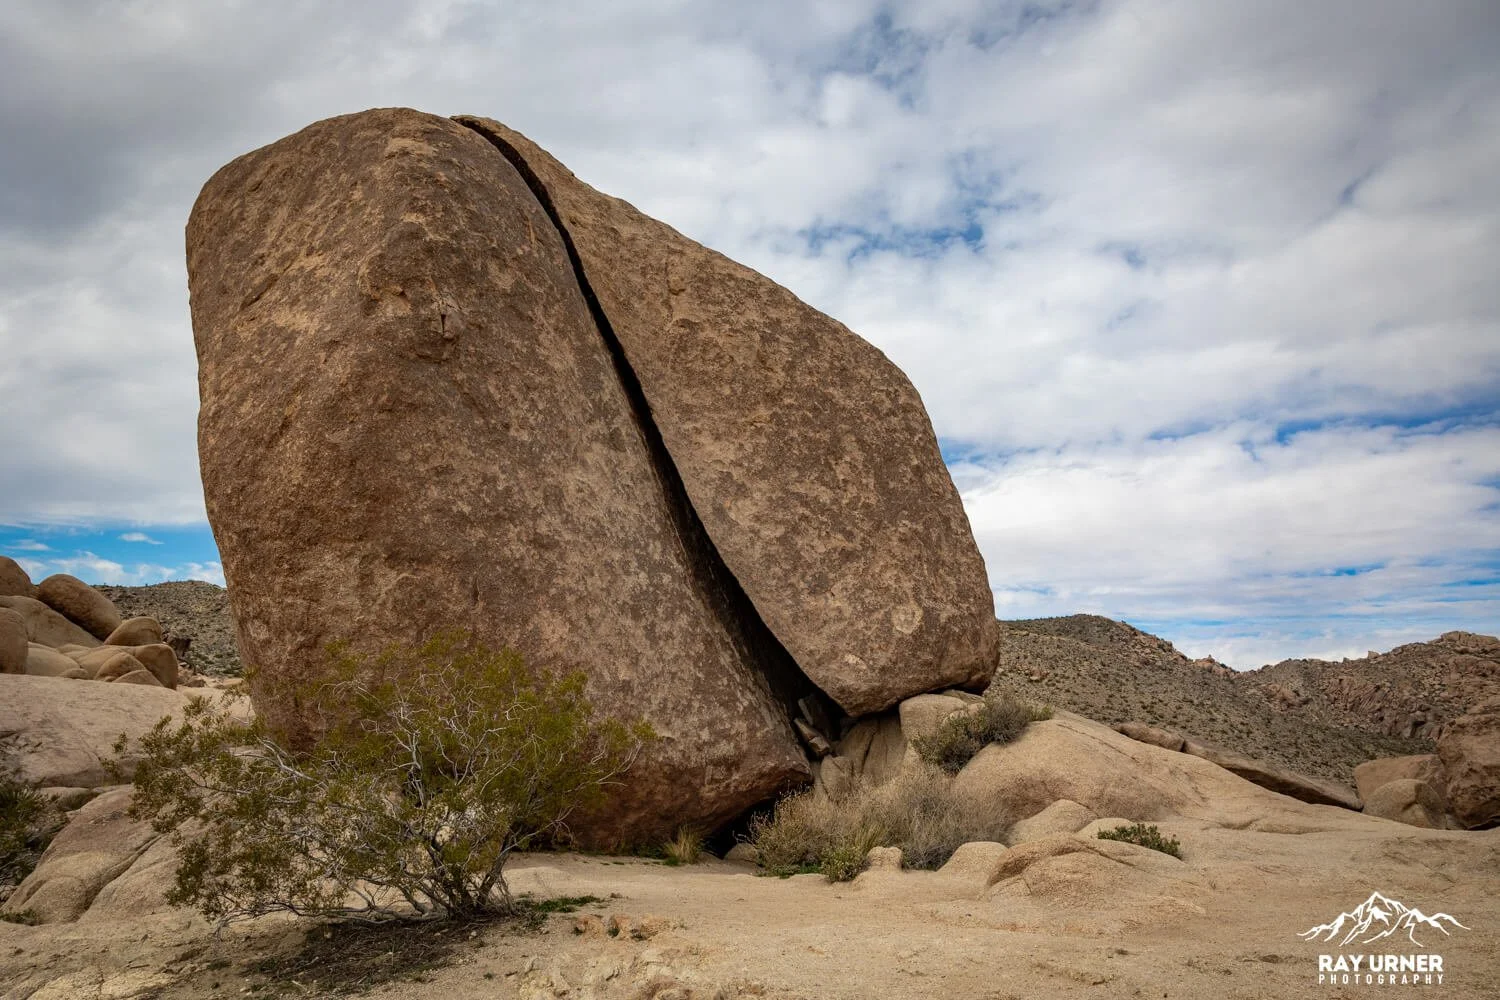
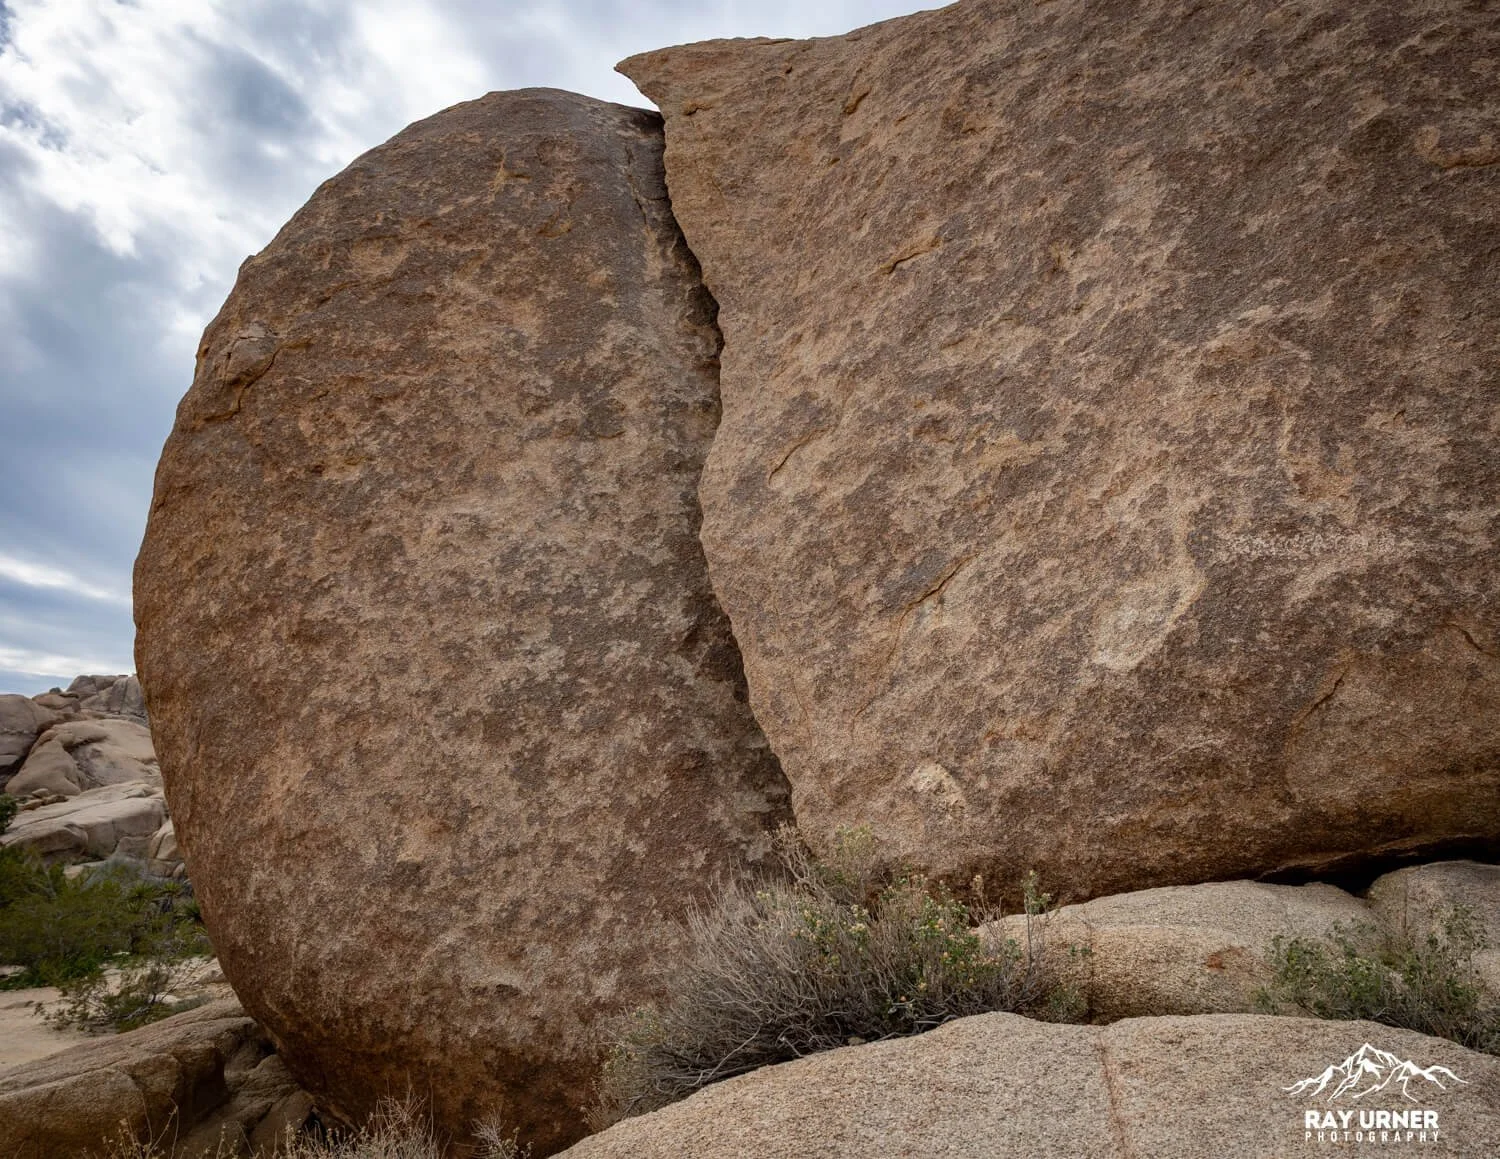
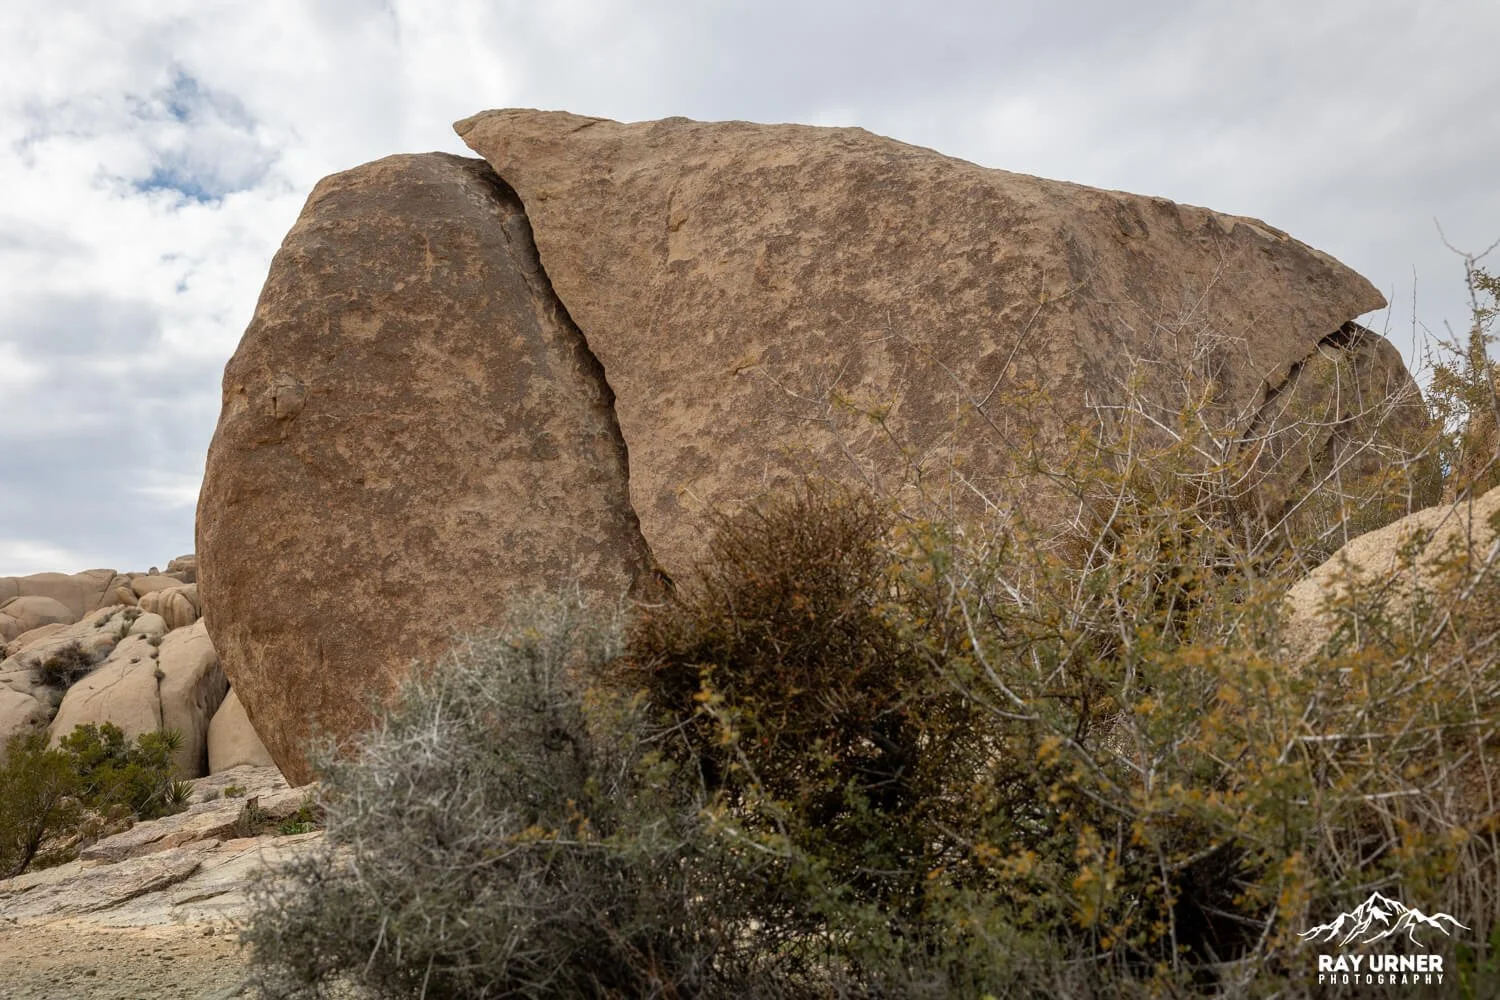
Split Rock
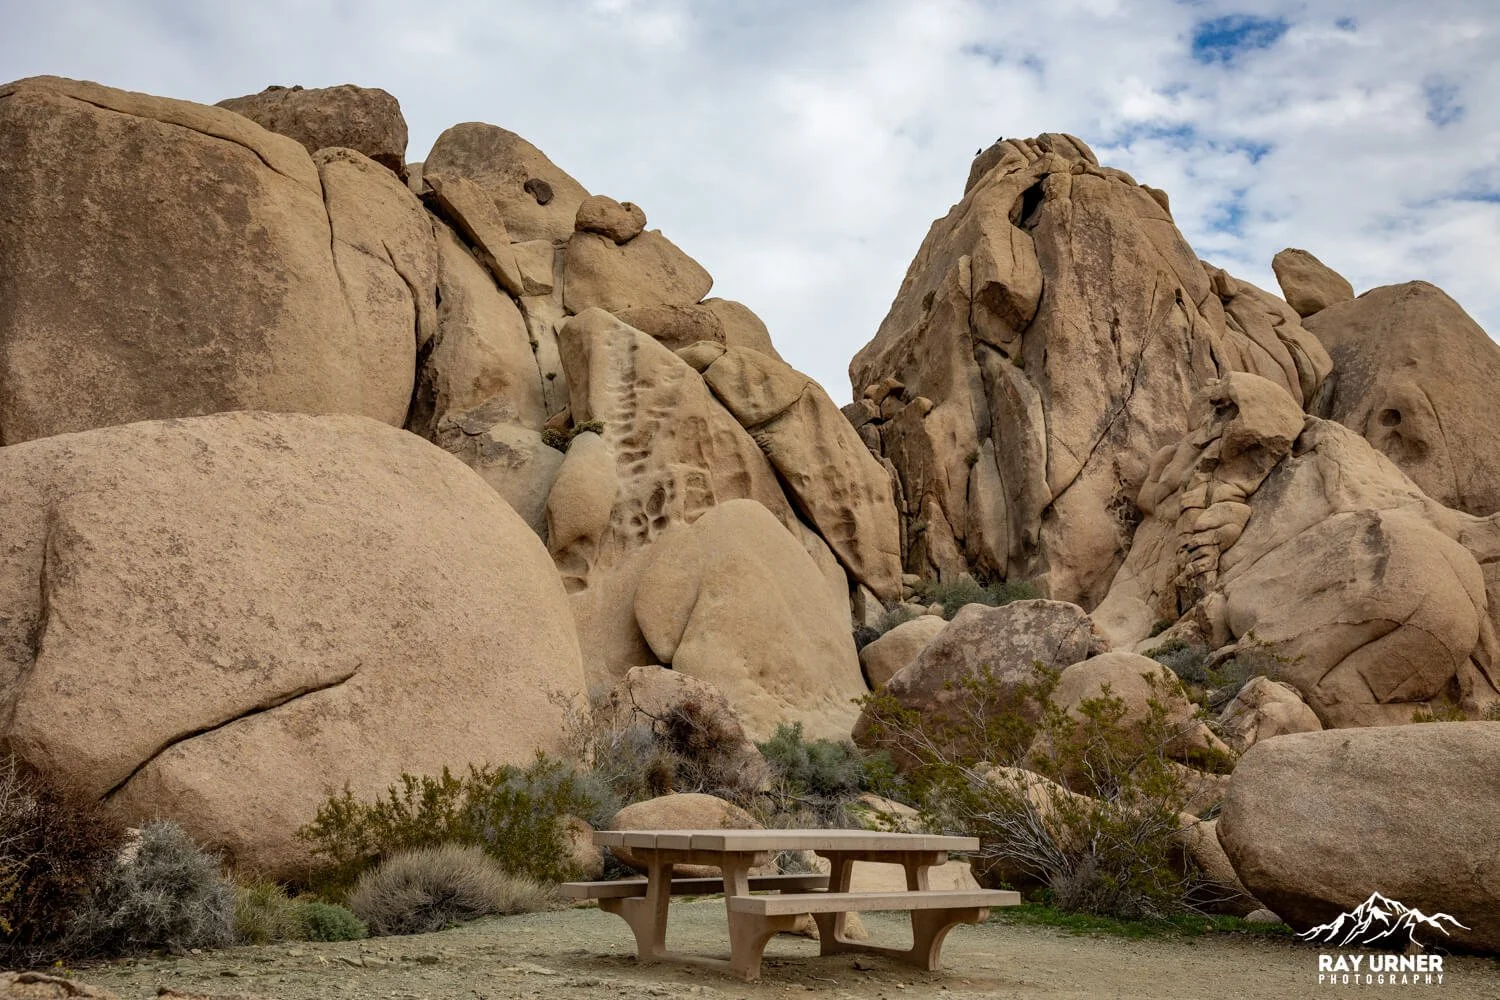
Split Rock is a massive monzogranite boulder cleaved down the middle by natural fracturing and erosion. It sits directly beside the Split Rock Trailhead at the end of Split Rock Road, a short signed turnoff from Park Boulevard.
The area includes a small parking lot, primitive toilet, and a dense concentration of photogenic boulders — all accessible without hiking the full loop!
Split Rock — Hiking and Photography Guide
Geology (Why Split Rock Looks Split)
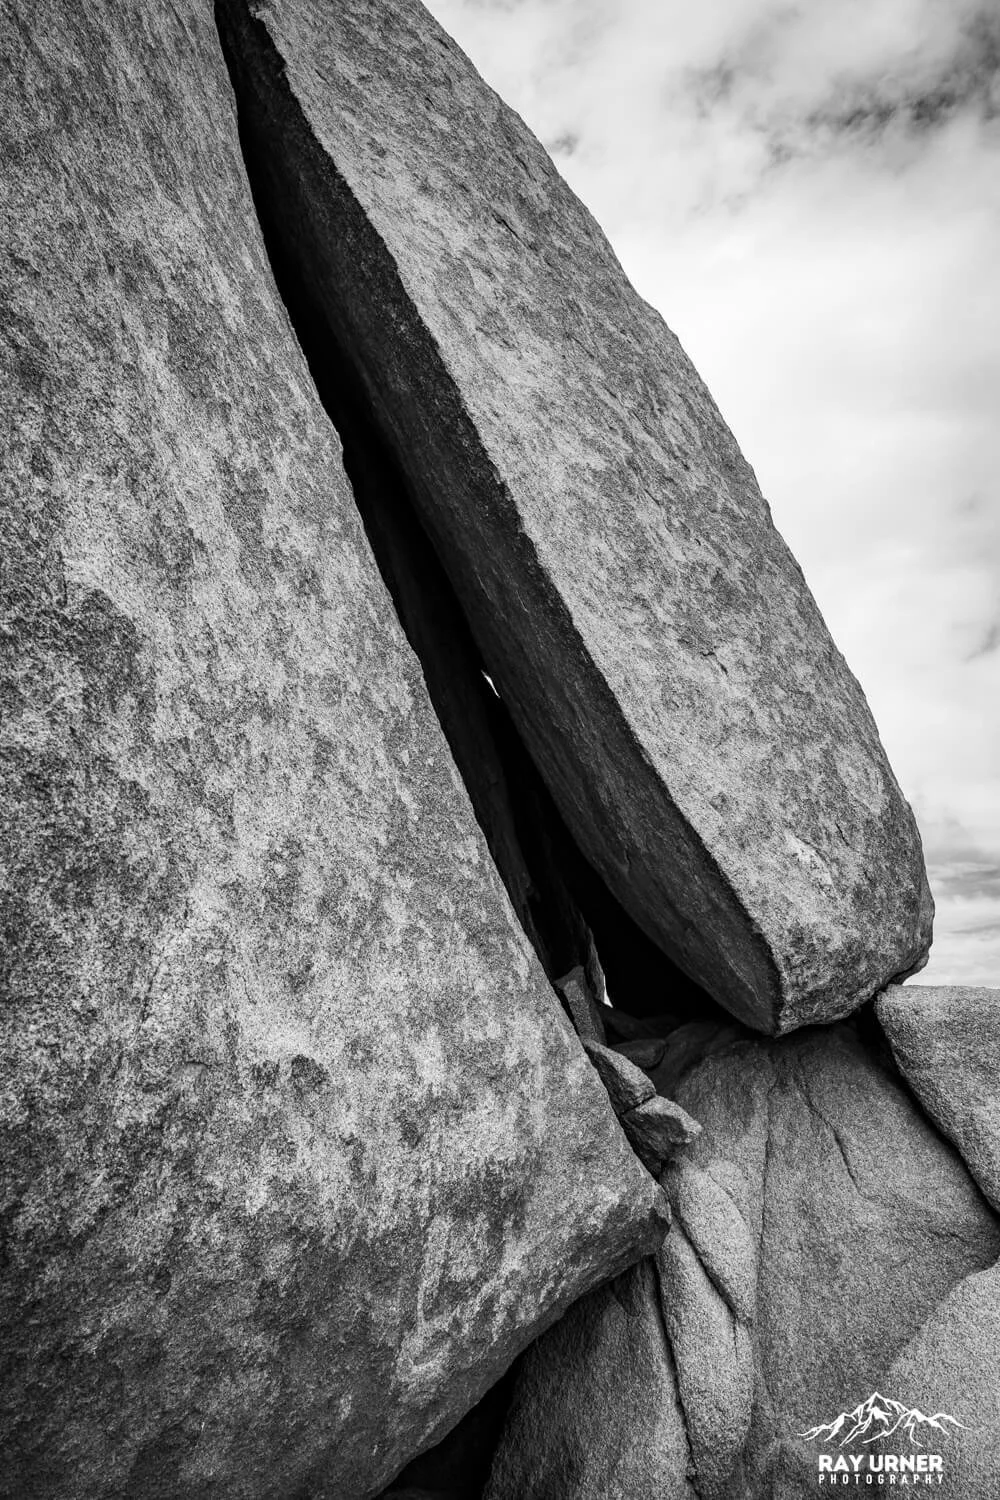
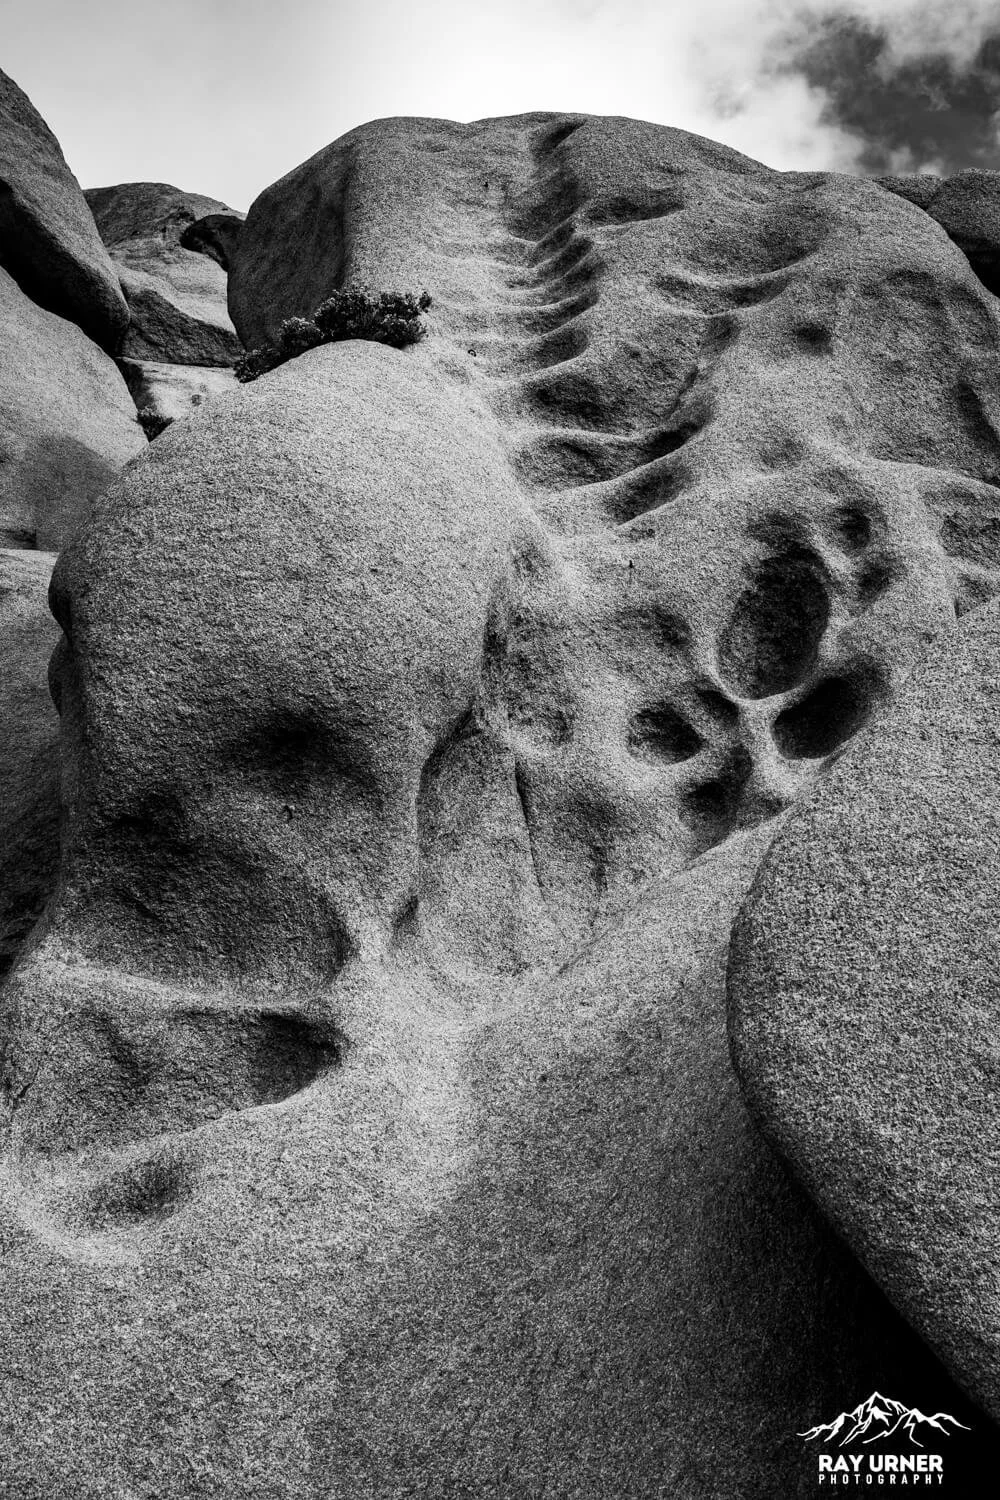
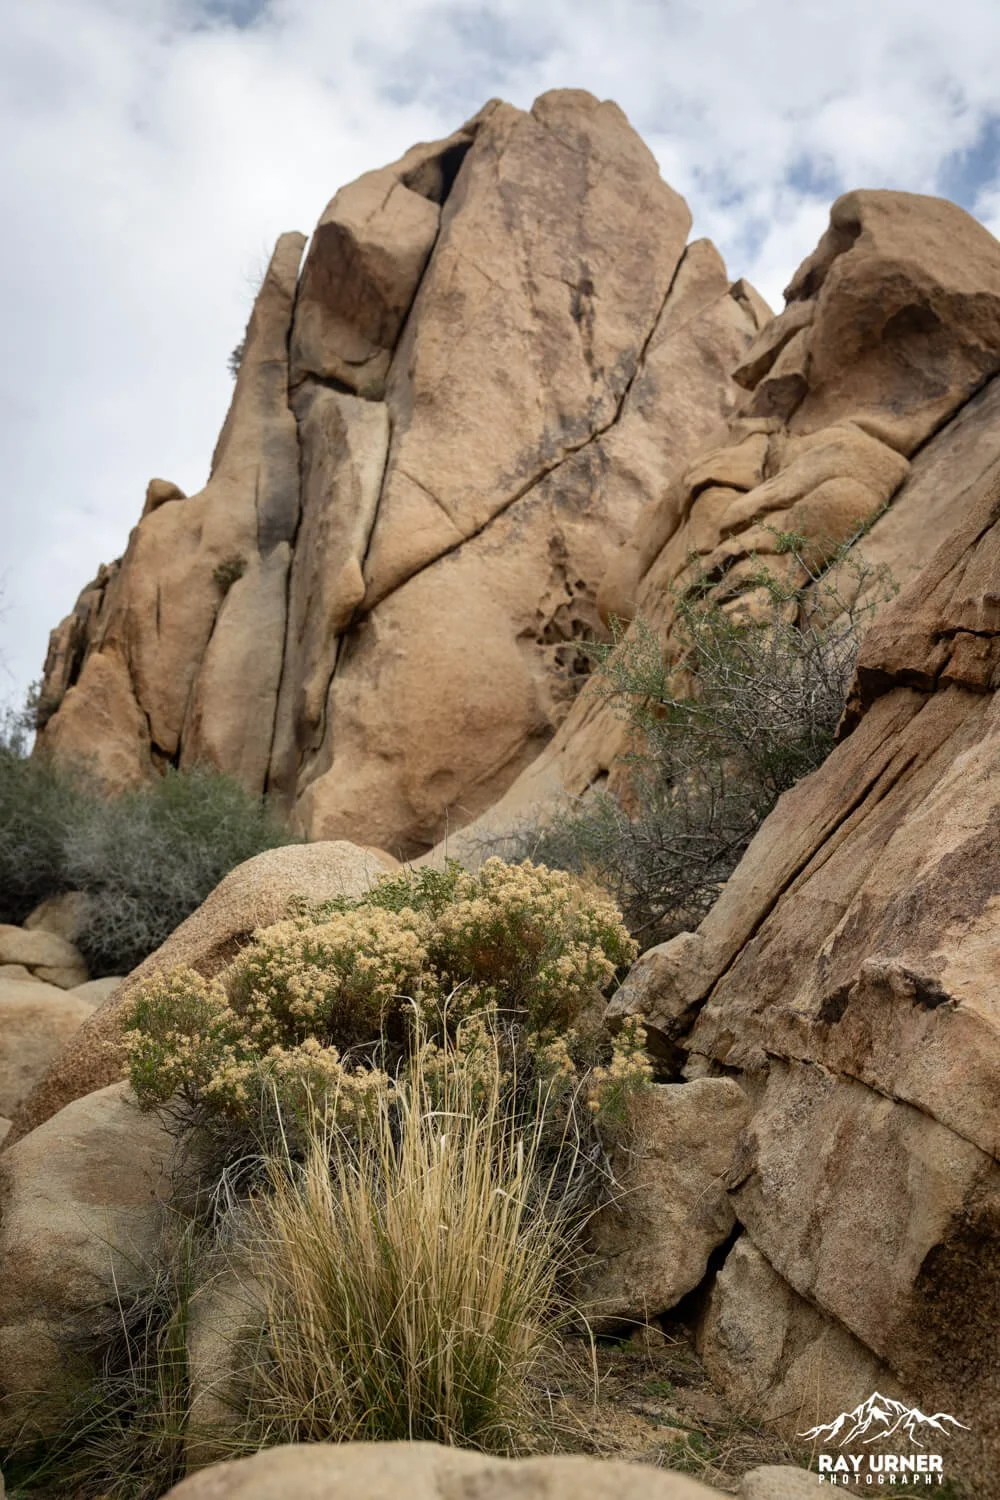
The distinctive “split” formed along joint fractures inside monzogranite — the dominant intrusive rock responsible for almost all of Joshua Tree’s iconic formations. These fractures developed when molten granite cooled underground millions of years ago, creating a grid of breakable planes.
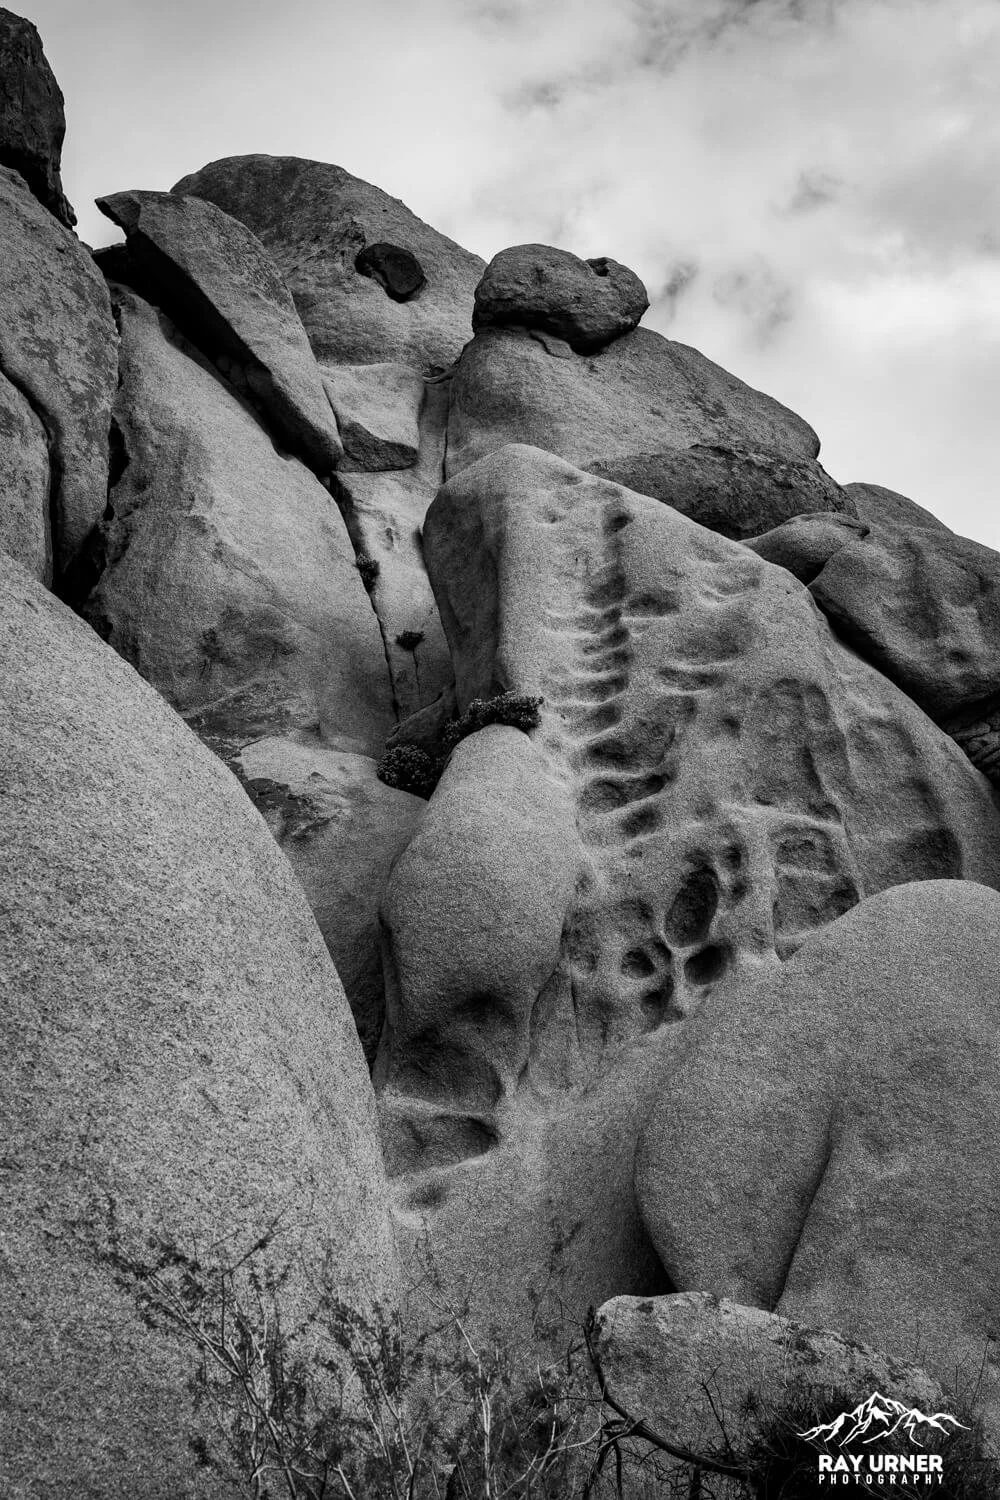
Over time, chemical weathering + groundwater infiltration widened the fractures, and subsequent erosion revealed the dramatic cleft we see today. Nearby formations show the same monzogranite joint system and spherical weathering common in Split Rock, Wonderland of Rocks, and Jumbo Rocks.
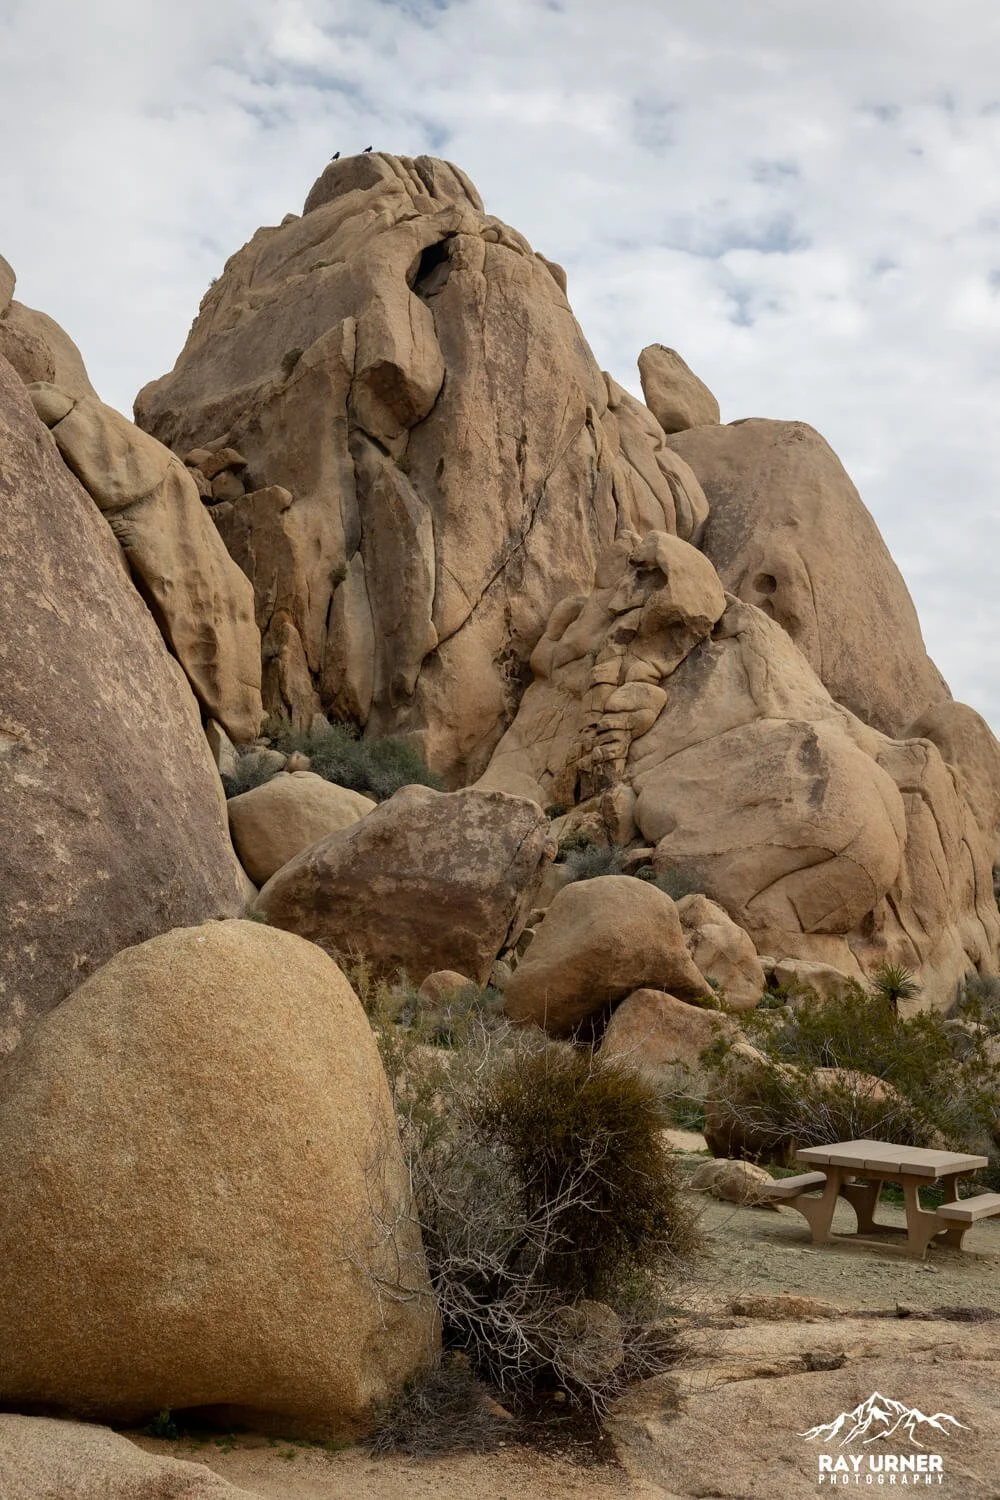
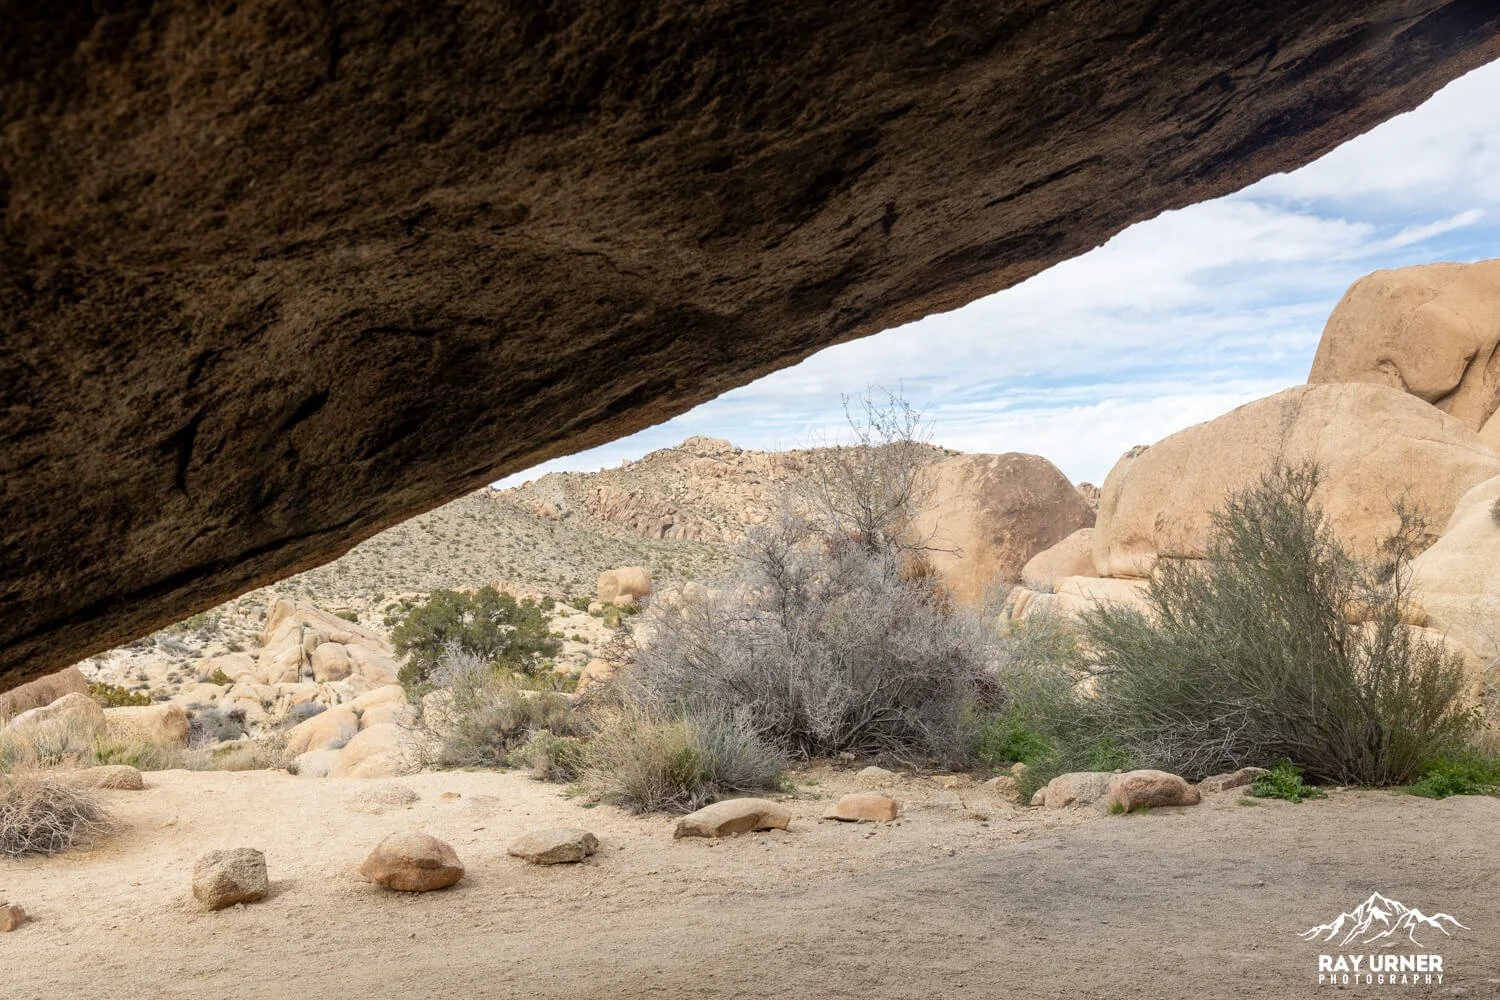
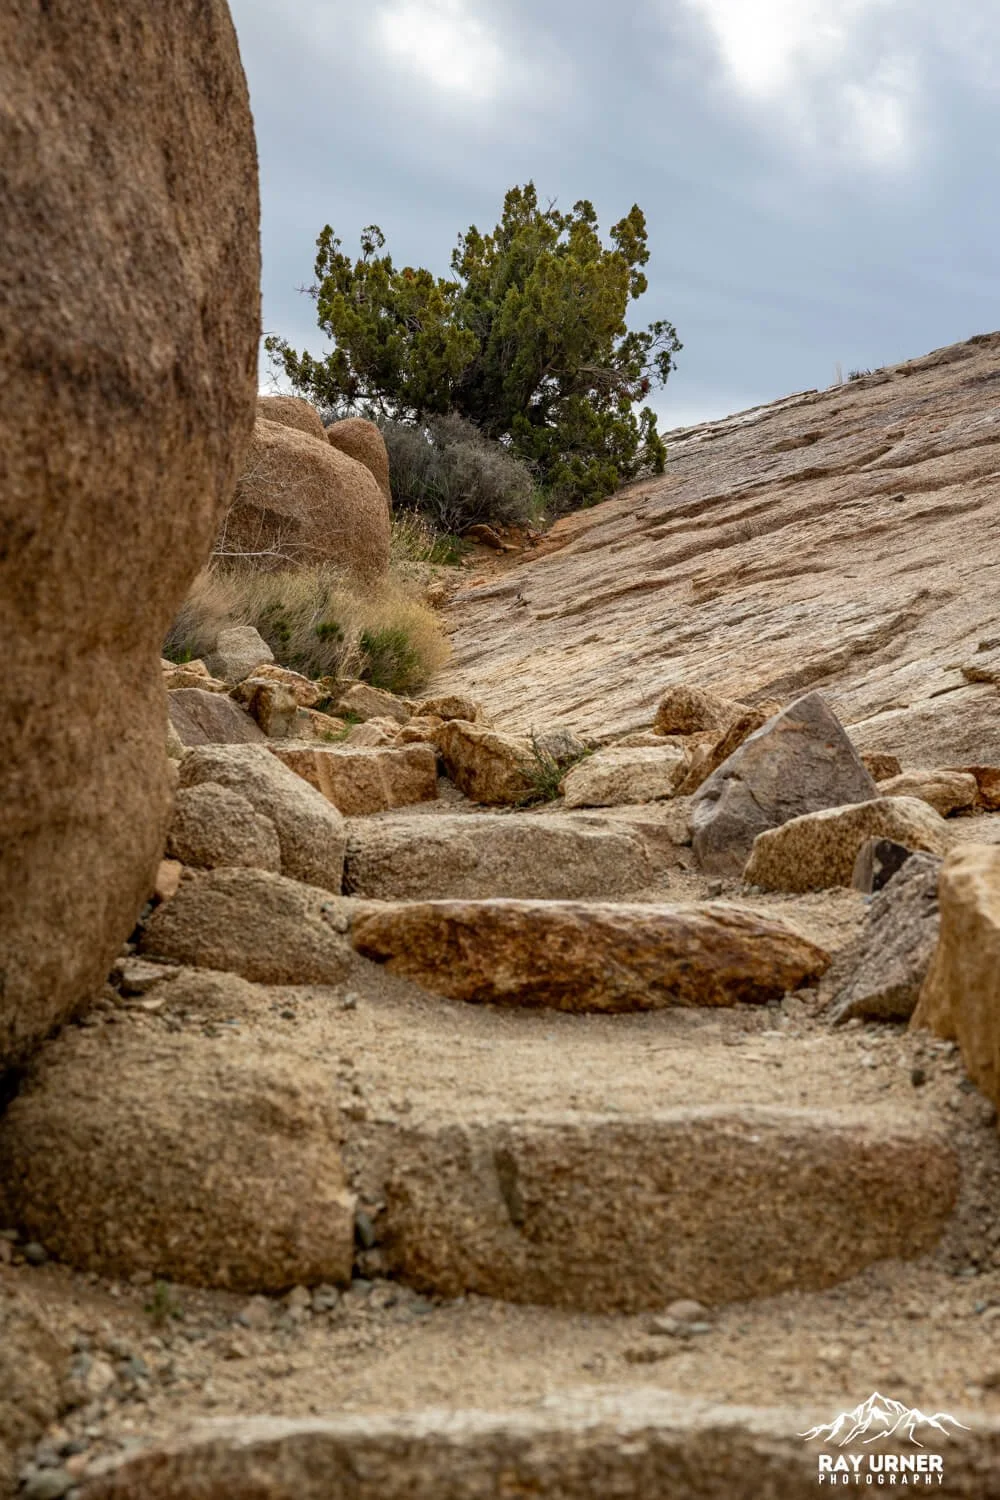
What You’ll See Around Split Rock (No Loop Required)
Staying near the trailhead gives you access to:
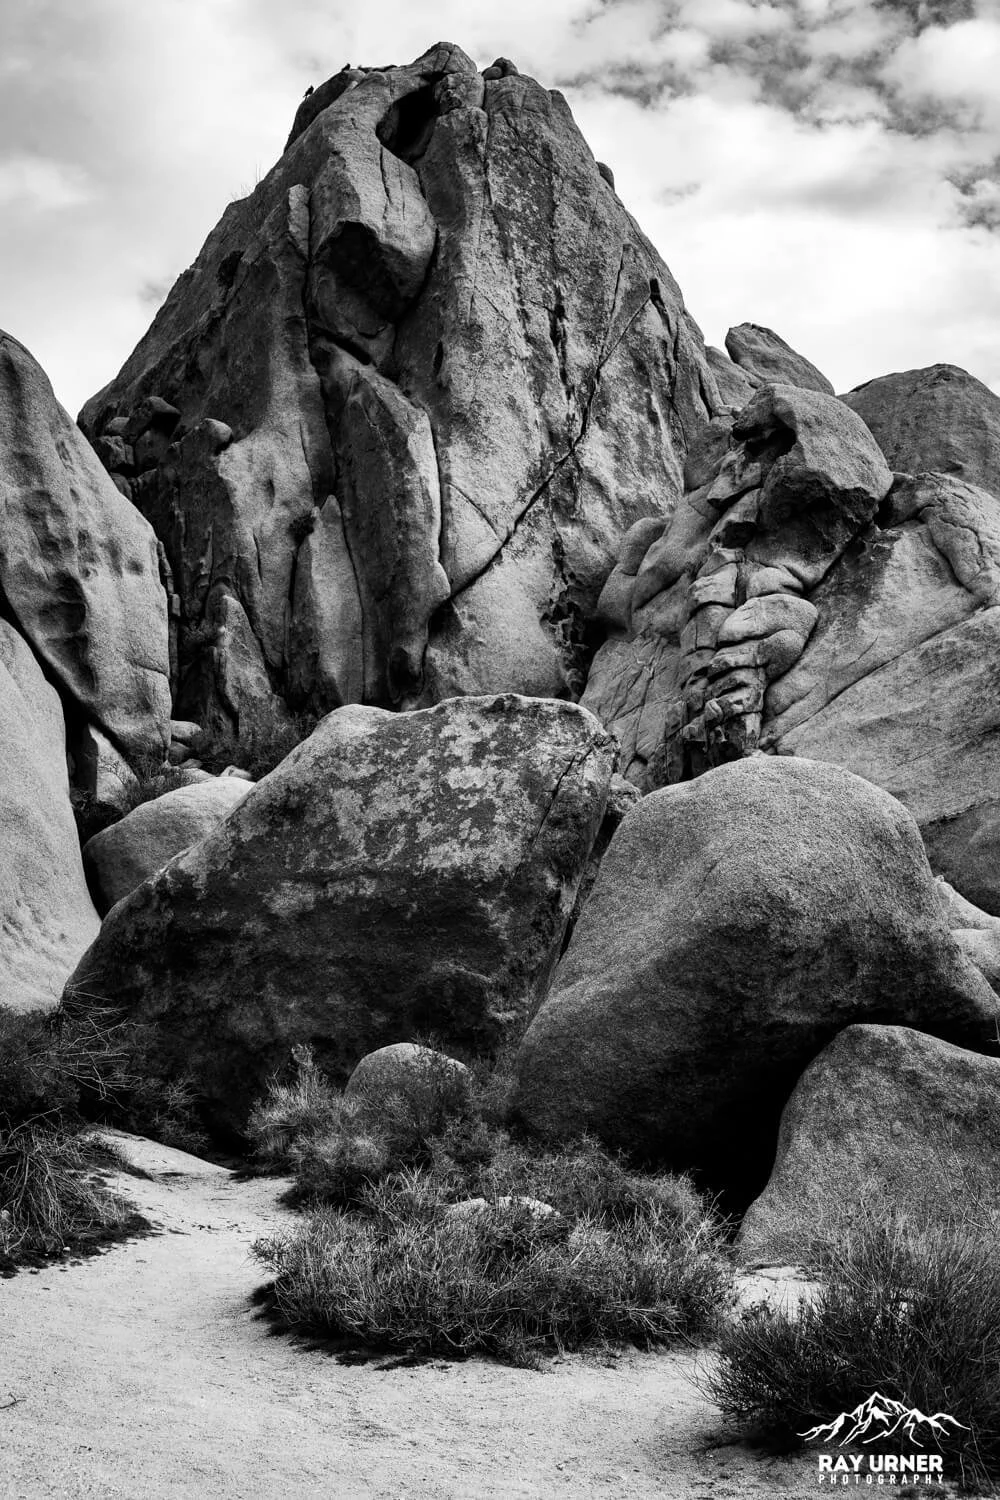
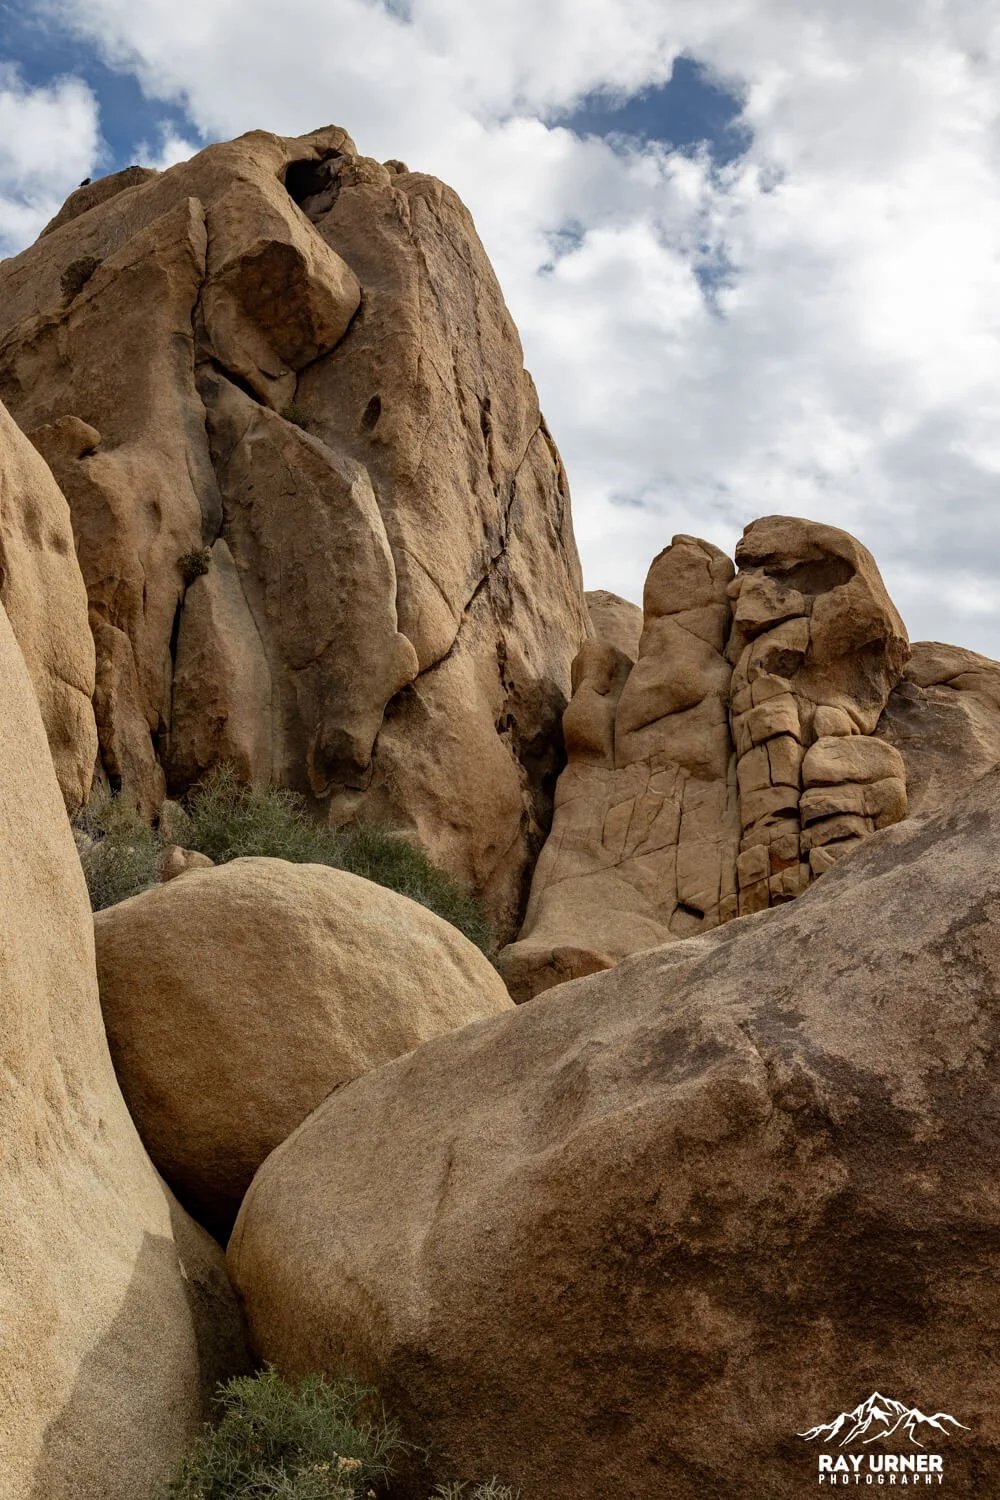
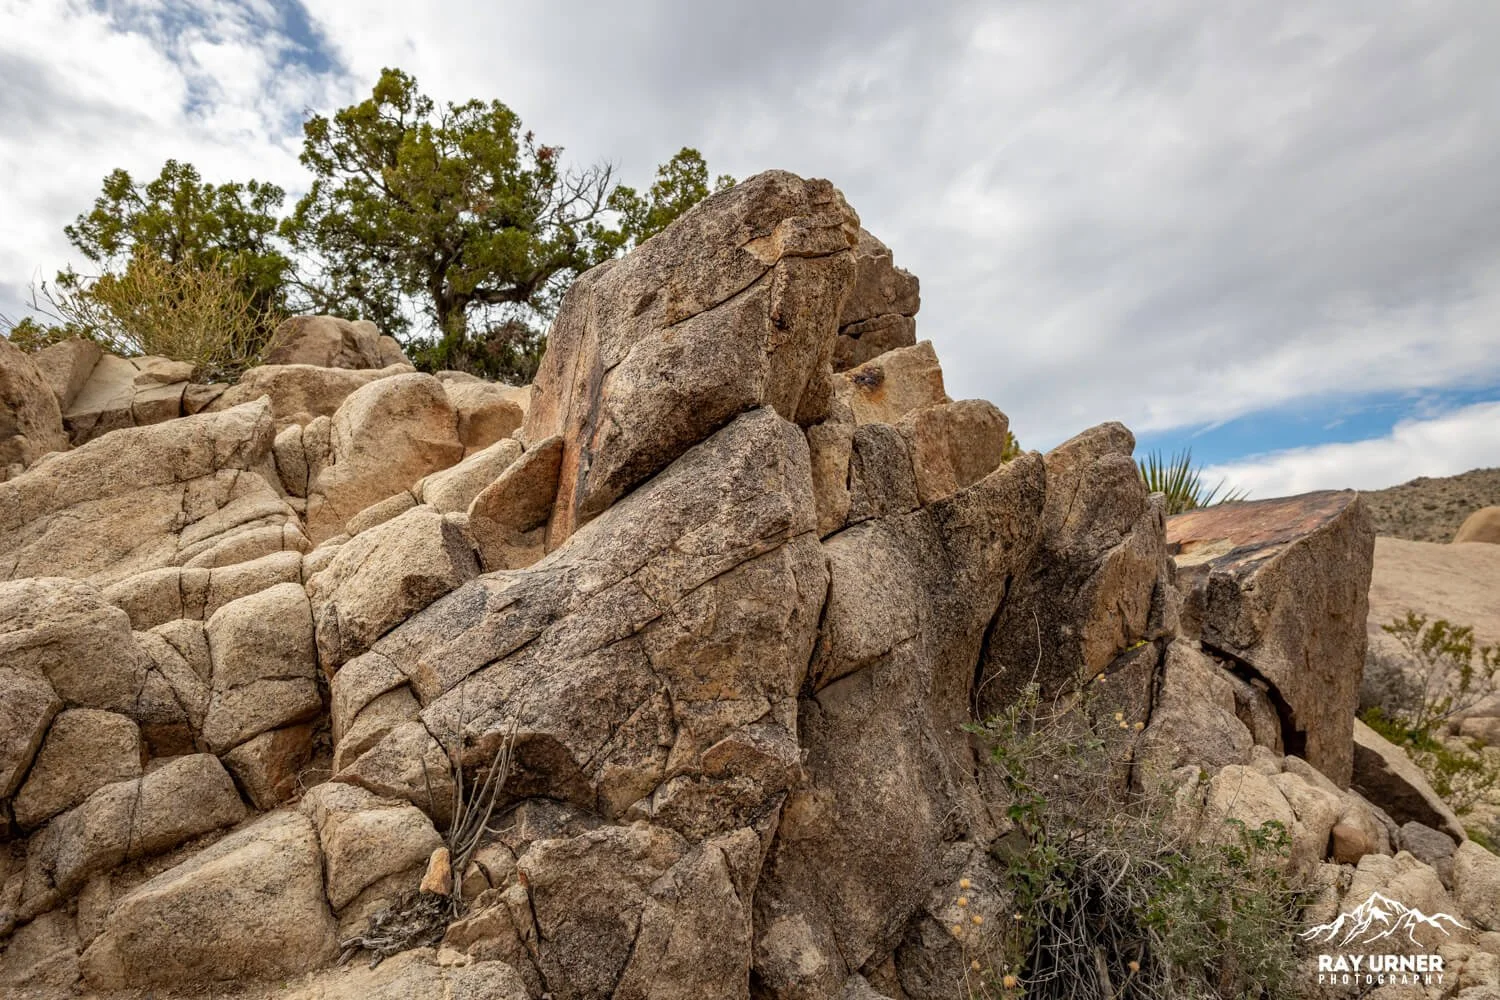
Split Rock itself — the dramatic bisected formation right beside the parking area.
Boulder clusters immediately surrounding the lot — excellent for climbing short slabs (safe, low‑risk angles).
Desert flats and scattered Joshua trees framing the boulder piles — great for wide environmental images.
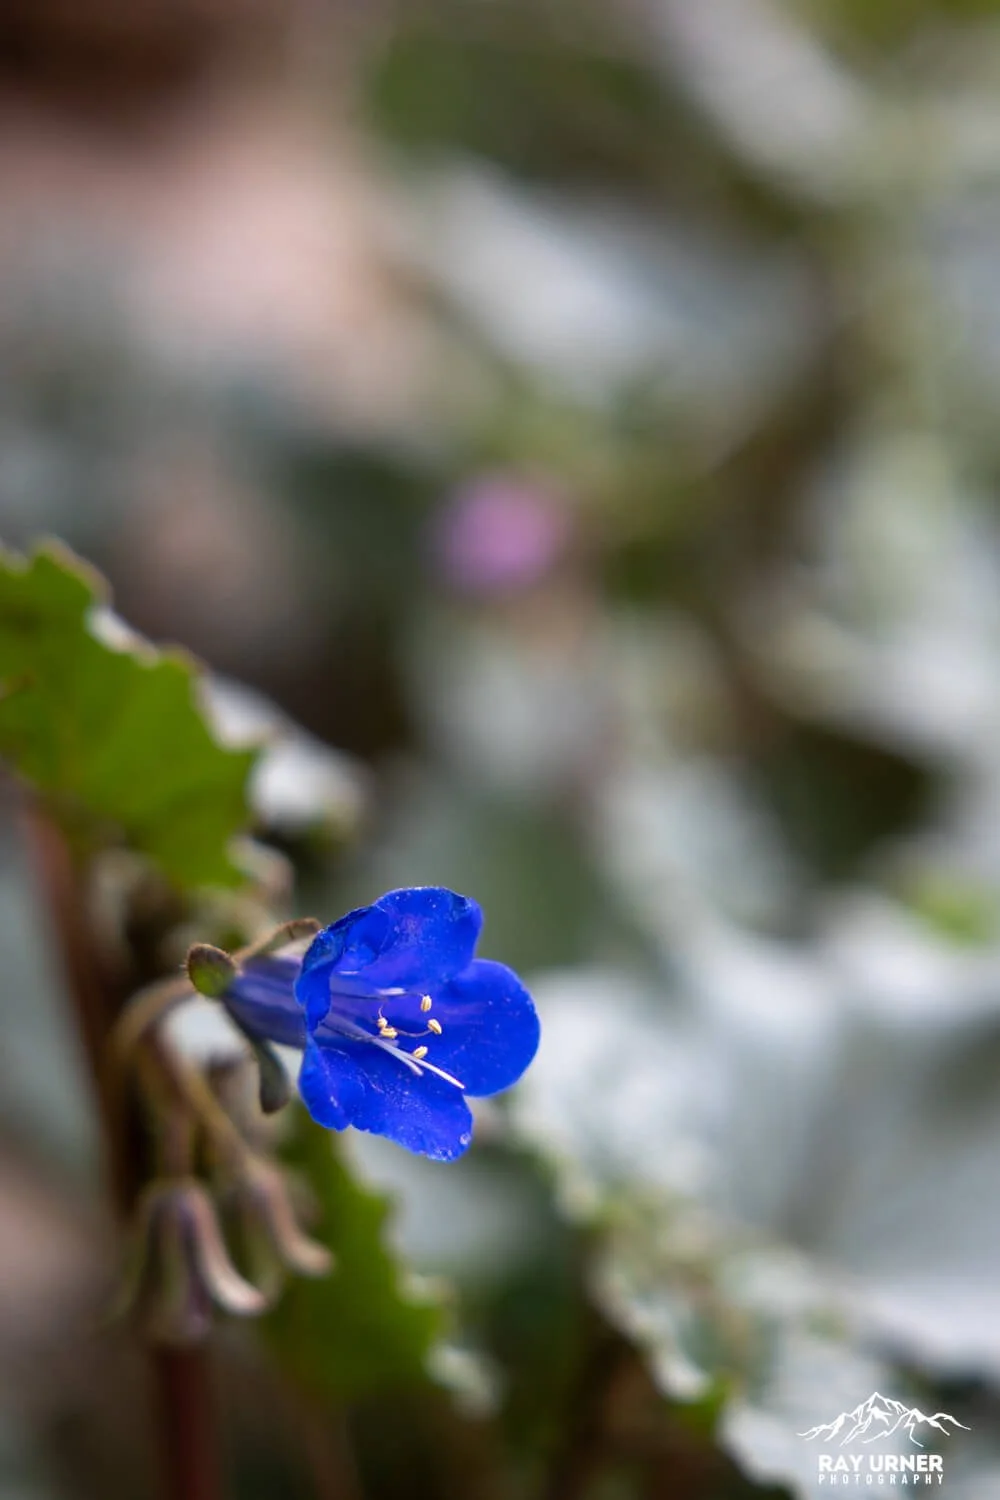
Native flora that thrives in the granitic soil: indigo bush, buckwheat, desert paintbrush, and cactus species in spring bloom.
You can photograph all of these within a few hundred meters of your parked vehicle.
Best Photo Angles at Split Rock
1. The Main Cleft (Front Face)
Stand directly in front of Split Rock to capture the dramatic vertical split.
Wide‑angle (14–24mm) exaggerates scale.
Midday works surprisingly well because the fissure casts deep shadow contrast.
Ideal for adding a human figure for scale.
2. Side Profile of the Boulder
Walk around the formation to the left side — the split becomes a subtle receding notch, which creates a powerful diagonal composition.
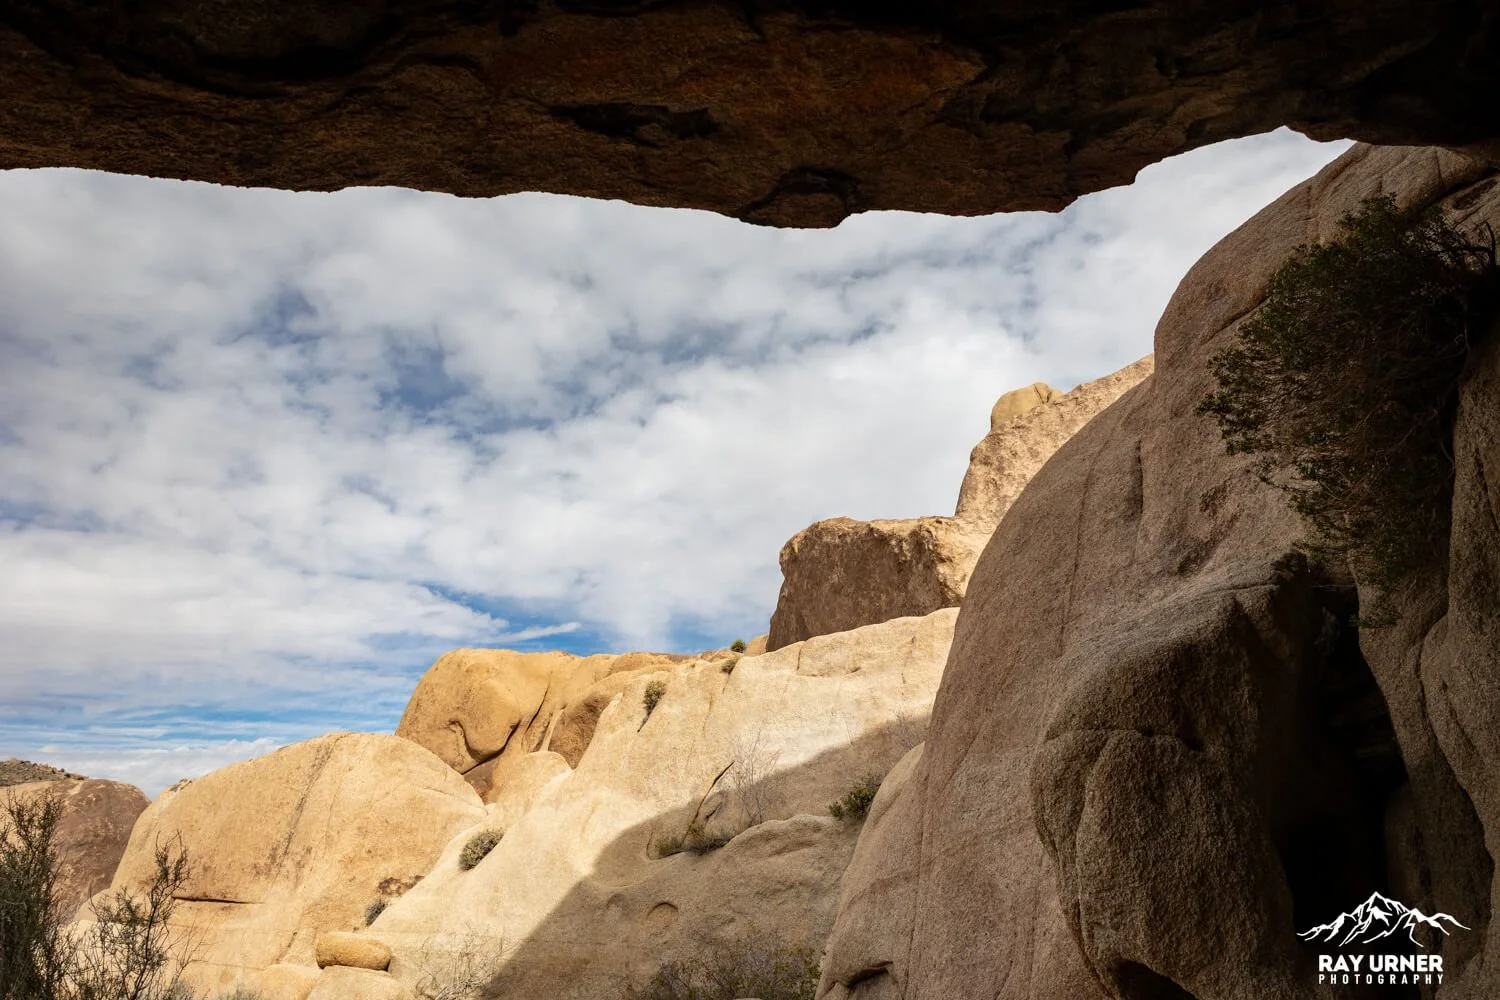
3. Boulder Field Backdrop
Behind Split Rock are sculpted monzogranite piles formed by joint weathering.
Great for layered depth: foreground boulder → mid‑pile → distant sky.
Shoot 35–50mm for clean hierarchy.
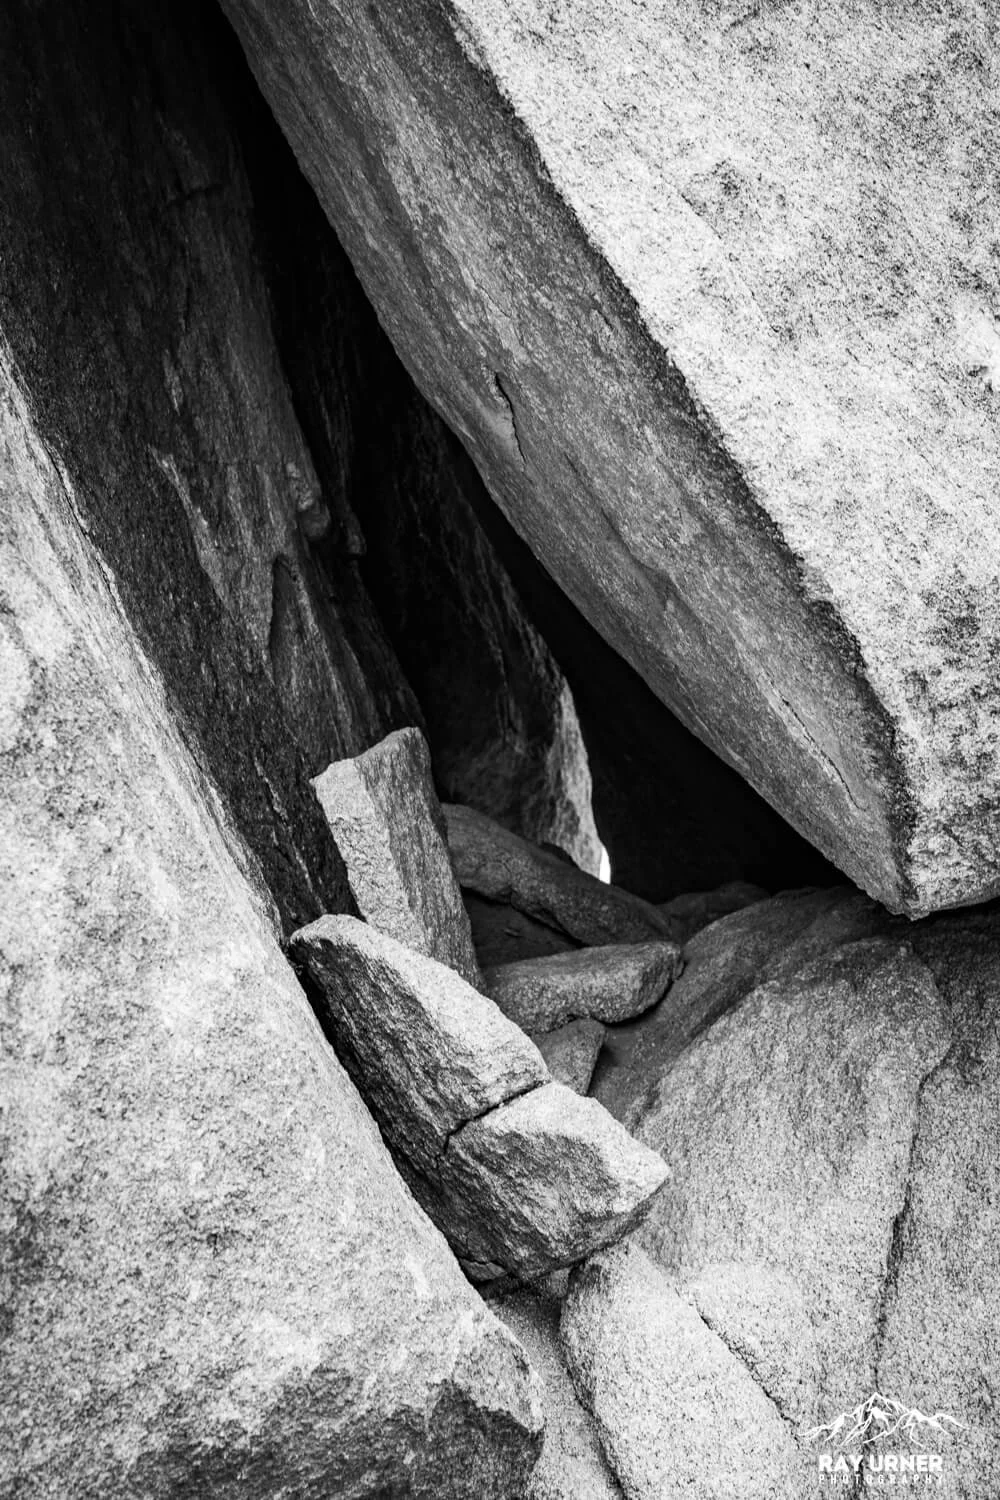
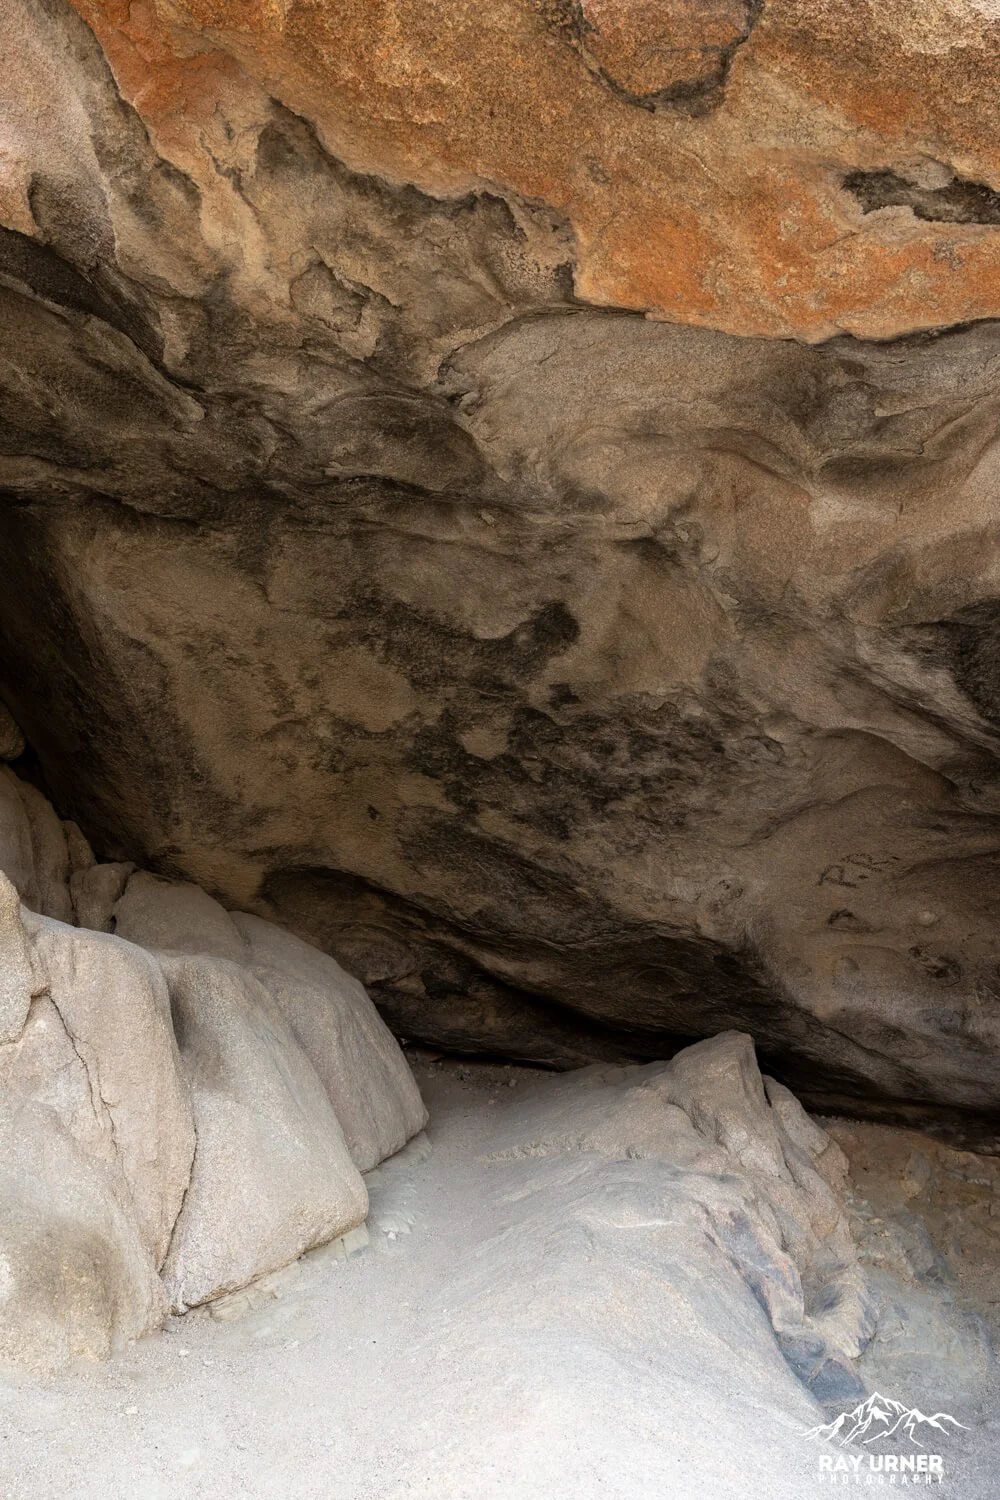
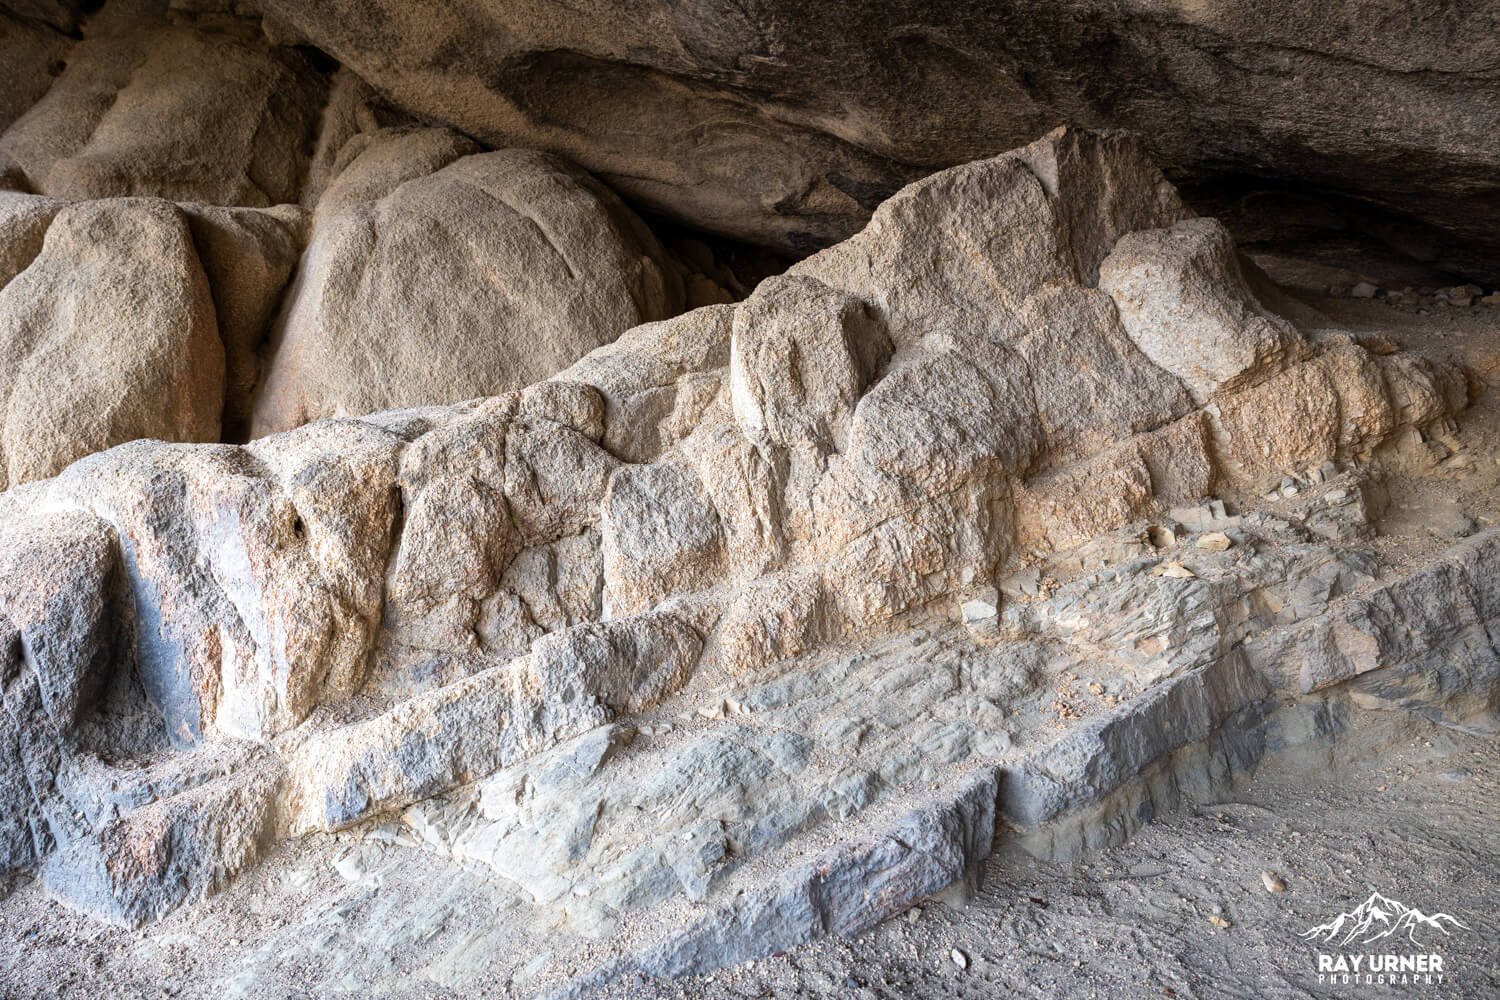
4. Inside Split Rock
Walk around the back of the rock, and head right on in!
Light & Timing
Morning: Softer side‑light on the cleft; best time for balanced exposure.
Midday: Excellent for highlighting vertical shadows inside the split — this formation photographs well even in harsh light due to its shape.
Late Afternoon: Warm tones on the surrounding boulders; great for tree‑and‑rock compositions.
No need to rely on golden hour — this area holds its compositional power in nearly any lighting.
Ecology Around Split Rock
Even without the loop, you’ll encounter:
California indigo bush (cobalt‑purple blooms Apr–May)
Cushion foxtail cactus with brilliant pink blossoms Apr–Jun (rare + endemic)
Desert paintbrush (bright red bracts) Mar–Sept
Photographers love these for macro shots or placing them in the foreground with granite texture behind them.
Practical Tips
Parking fills mid‑morning — arrive early.
Bring plenty of water; there is no shade and no water in the area.
The dirt road to the trailhead is manageable for all vehicles.
Don’t underestimate the photographic value right around the lot — some of the best compositions at Split Rock require zero hiking.